Breaching Rainbow Trout Trucker Hat
by @dekasso

Clear of the water, just for a second.
A rainbow trout arching out of white and ice blue spray, in olive green, rose red and cream, for days on and off the river.
A rainbow trout bursts clear of the water, body arched and jaw open, with spray flying out beneath it. Olive green, a rose red stripe and black speckles sit over a fan of ice blue and white splash.
- Rainbow trout arching out of the water
- Rose red stripe along an olive flank
- Ice blue and white spray below
- Black speckles across back, fins and tail
- Seven colour layers, background to highlight
The cap
One design, four caps. The front panel is what the paint or the dye sits on, so it changes the hat.
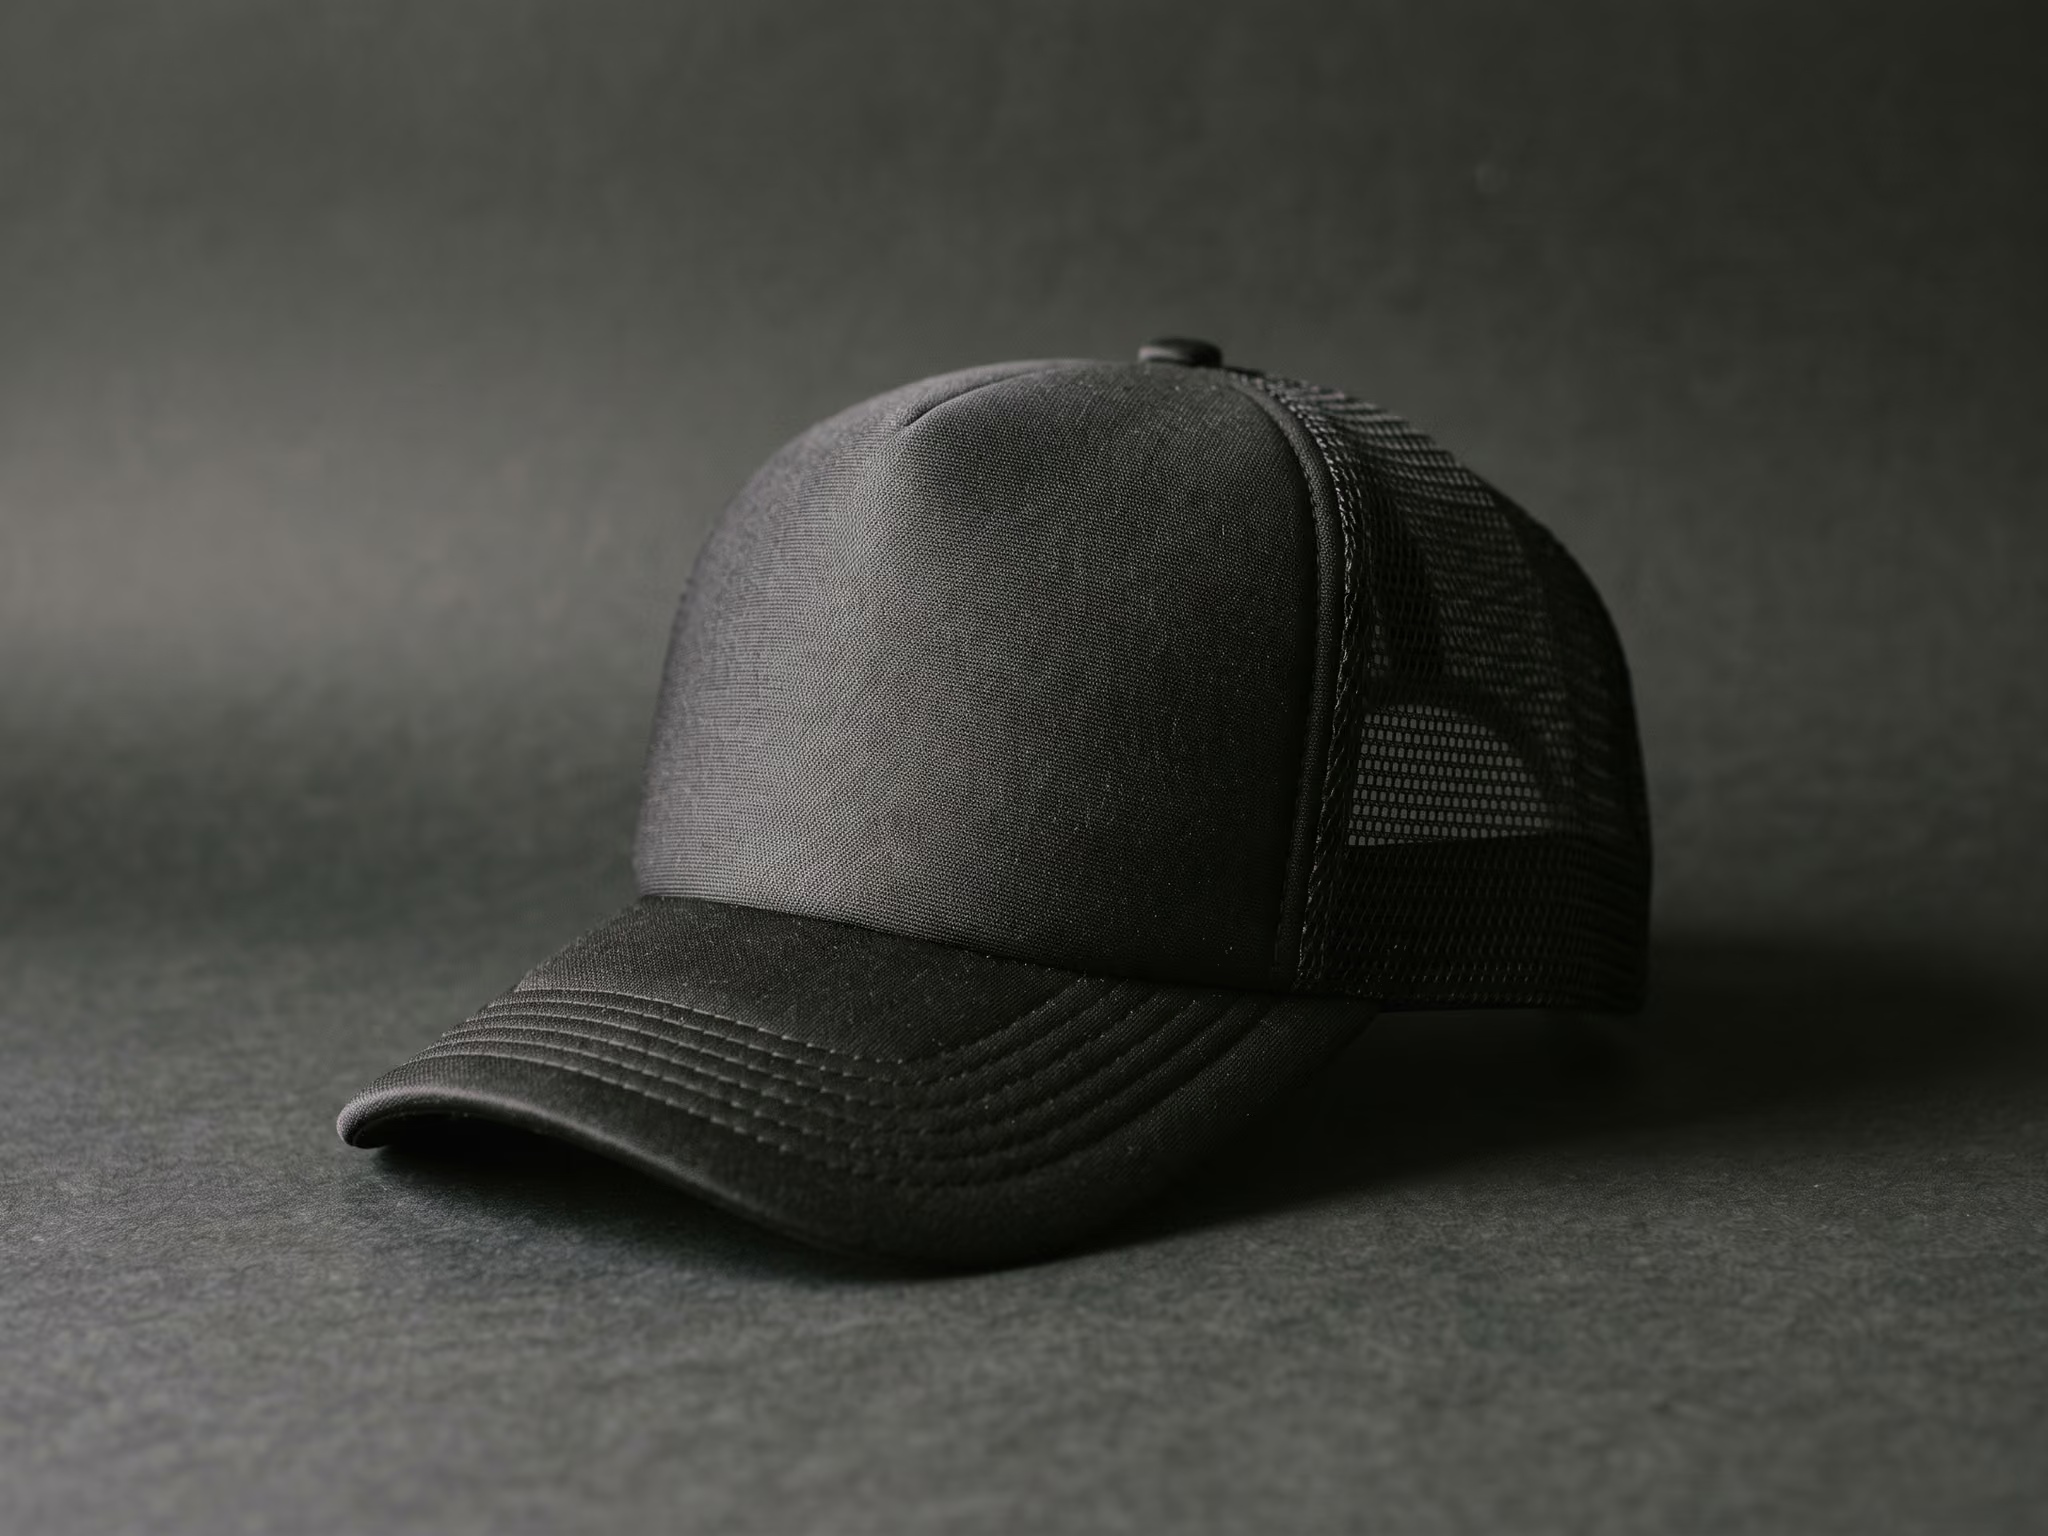
Trucker
The house cap — structured mid profile, foam-and-mesh back, snapback.
Specs
- Profile
- Mid profile
- Build
- 6-panel · Structured — buckram behind the front
- Crown
- 3½ in (8.9 cm)
- Visor
- Pre-curved, 2¾ in (7 cm)
- Closure
- Snapback
- Adjusts to
- 21½–24 in (54.5–61 cm)
- Airbrushed on
- Natural cotton twill
- Sublimated on
- White polyester foam
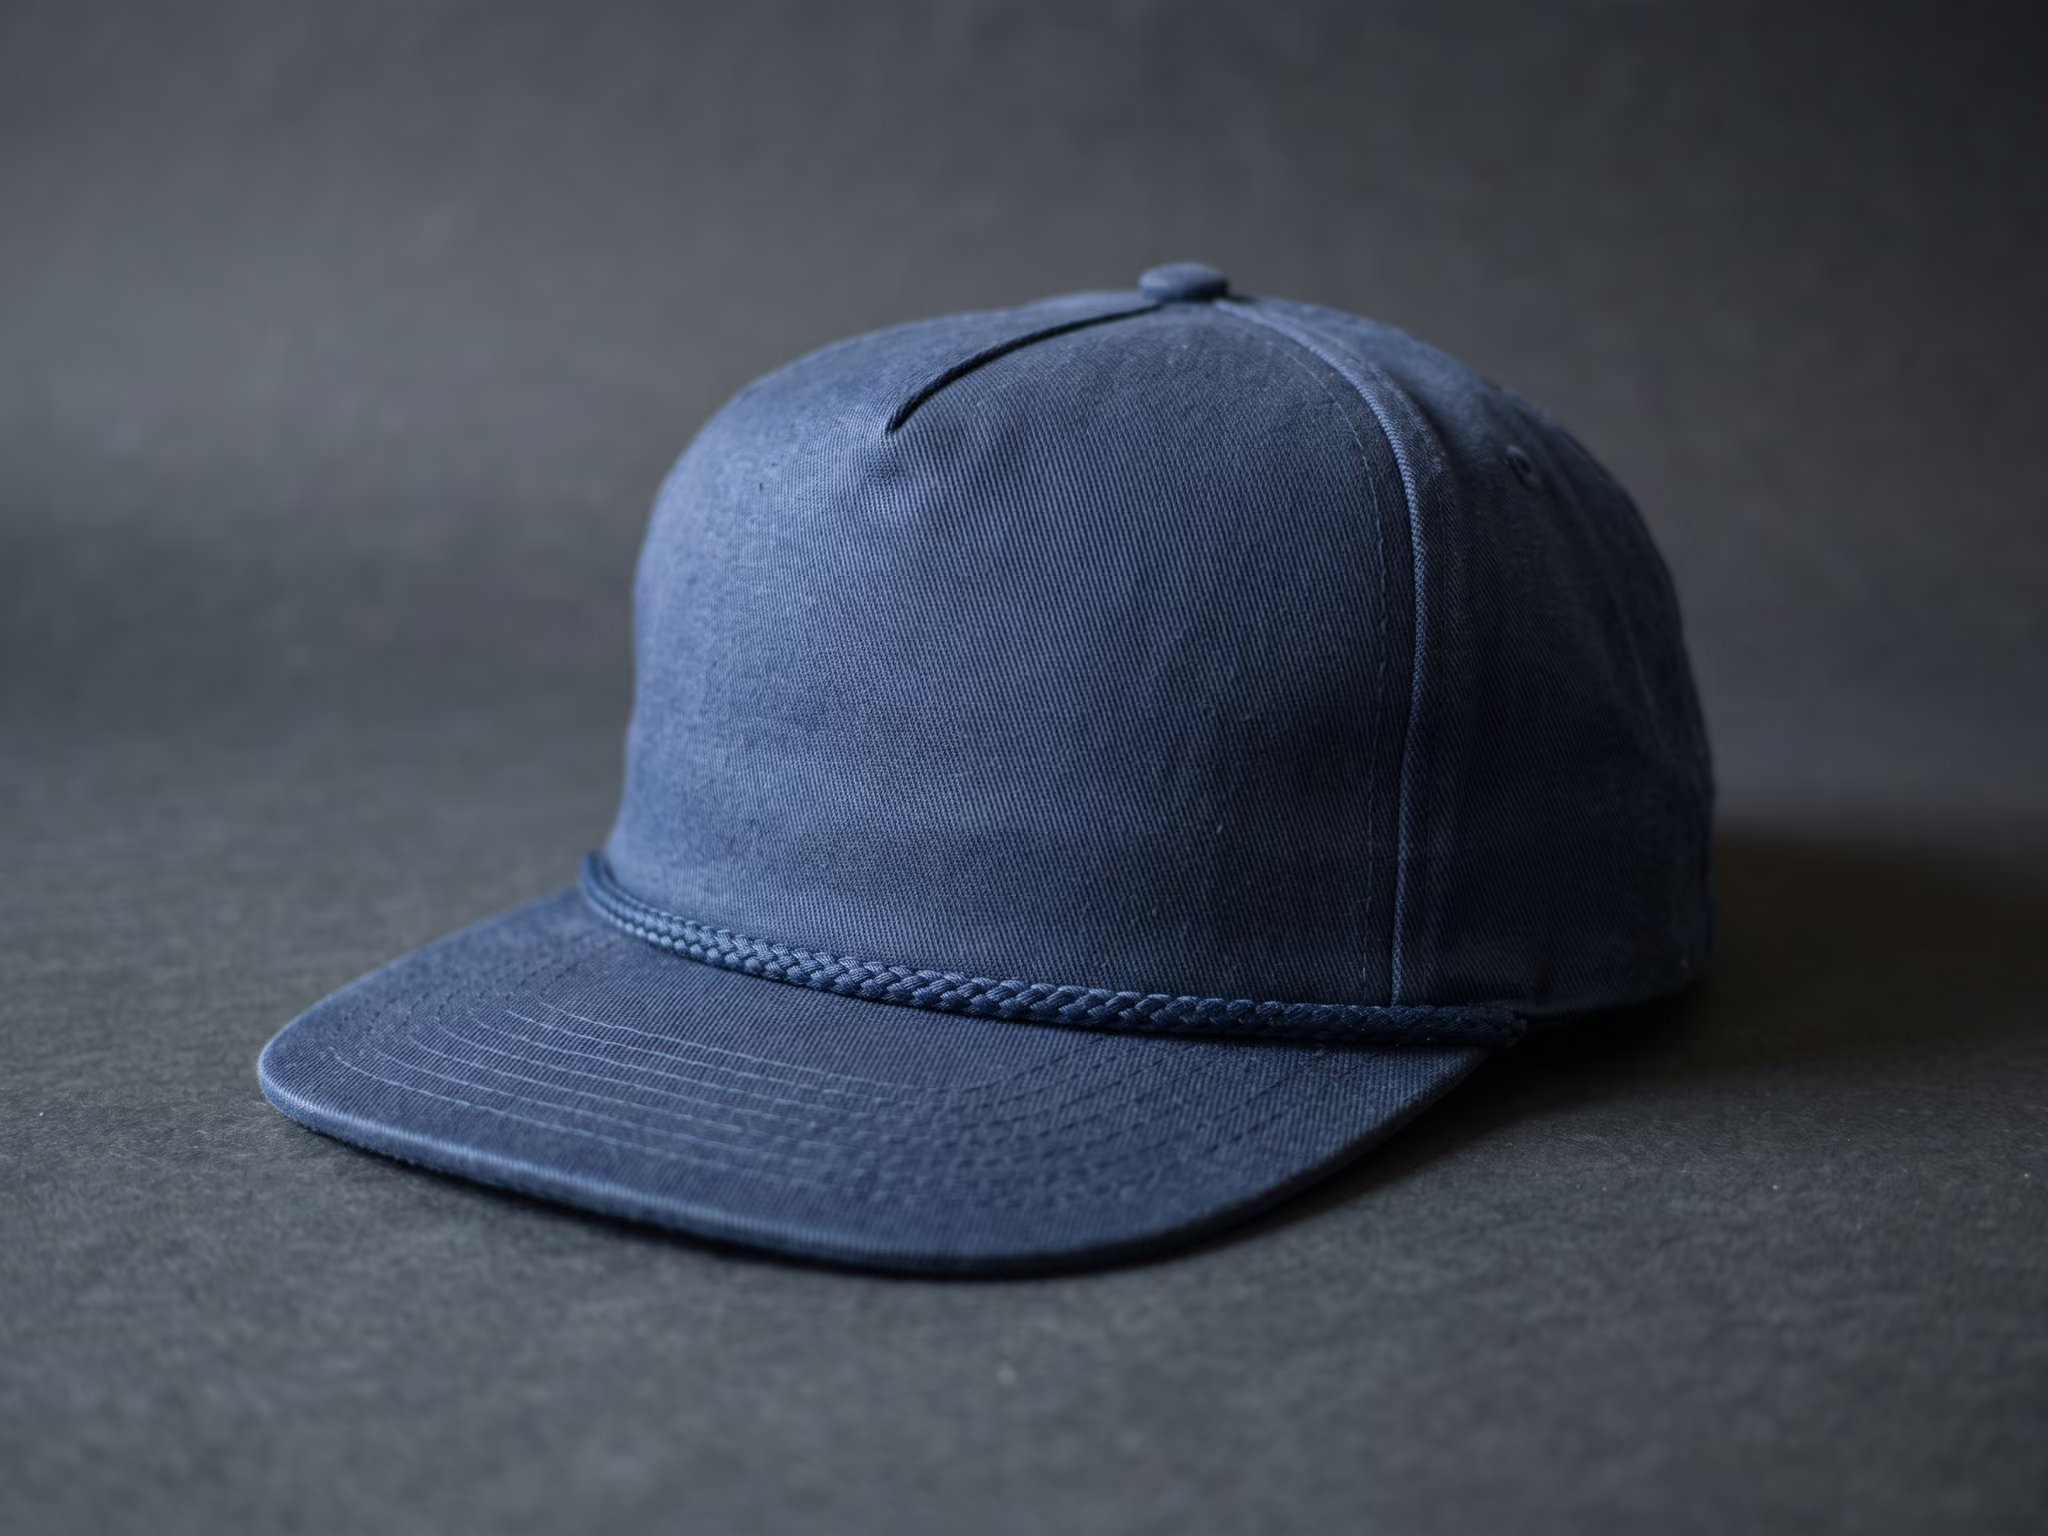
Rope cap
Structured five-panel with a near-flat brim and a cord across it.
Specs
- Profile
- Mid-high profile
- Build
- 5-panel · Structured
- Crown
- 4 in (10.2 cm)
- Visor
- Near-flat, 2⅞ in (7.3 cm), contrast rope
- Closure
- Snapback
- Adjusts to
- 21½–23¾ in (54.5–60.5 cm)
- Airbrushed on
- Stone cotton twill
- Sublimated on
- White polyester twill
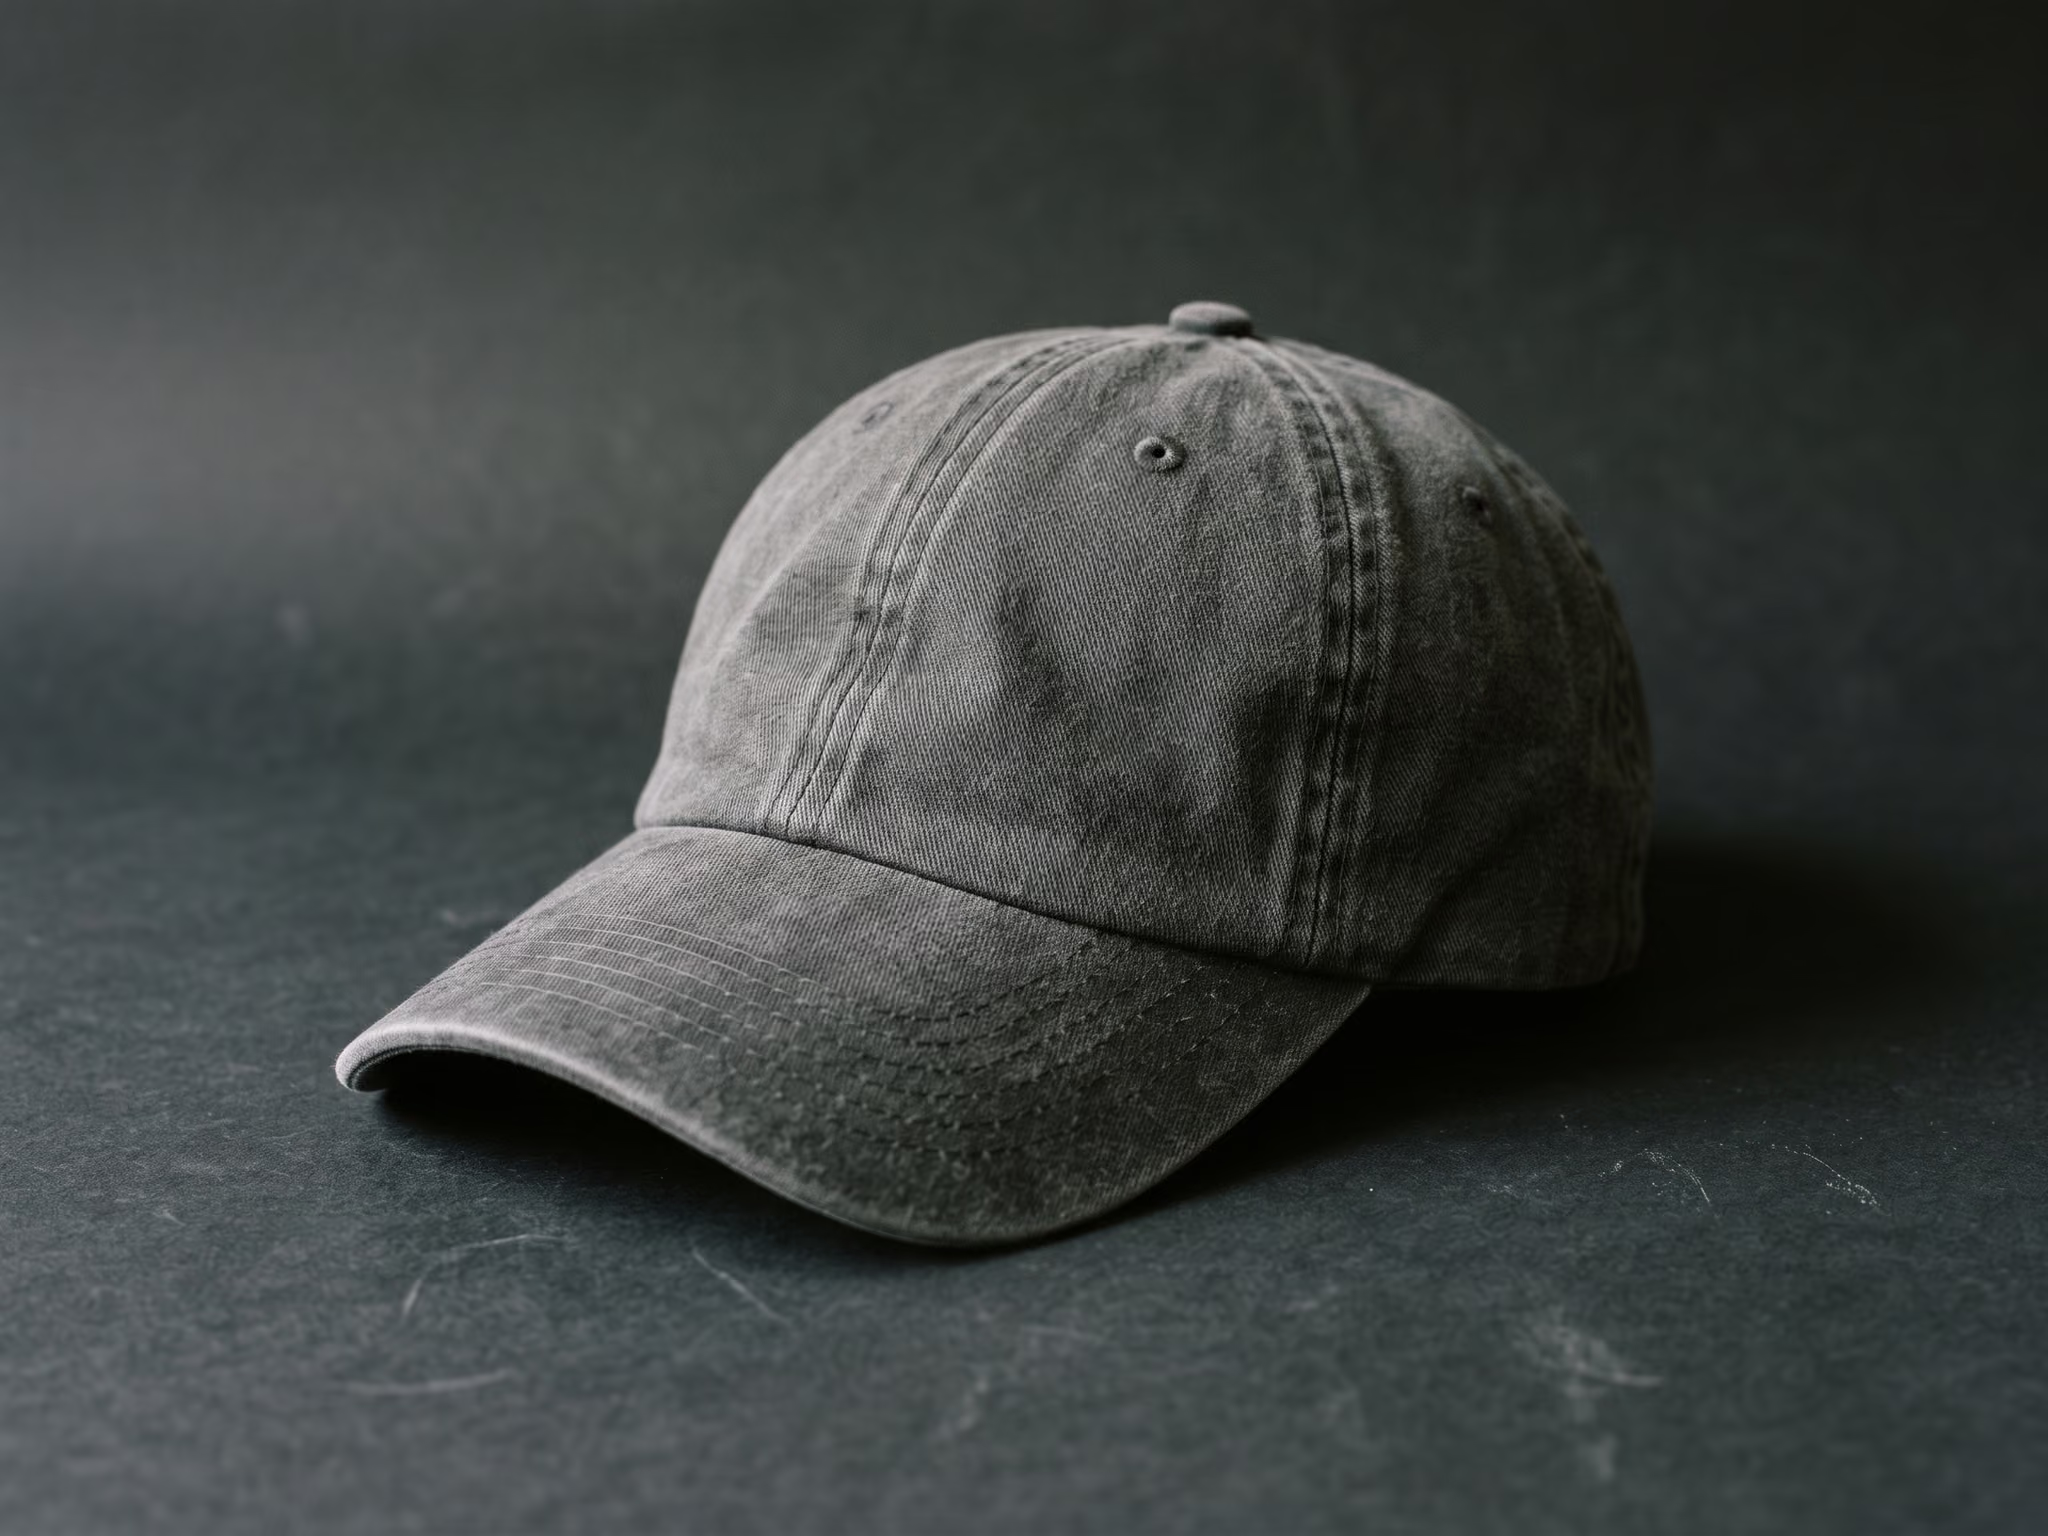
Dad hat
Soft, low and unstructured — washed cotton with a strap back.
Specs
- Profile
- Low profile
- Build
- 6-panel · Unstructured — soft front
- Crown
- 3¼ in (8.3 cm)
- Visor
- Curved, 2¾ in (7 cm)
- Closure
- Strap back, brass buckle
- Adjusts to
- 21–23½ in (53.5–59.5 cm)
- Airbrushed on
- Washed khaki cotton
- Sublimated on
- White polyester twill
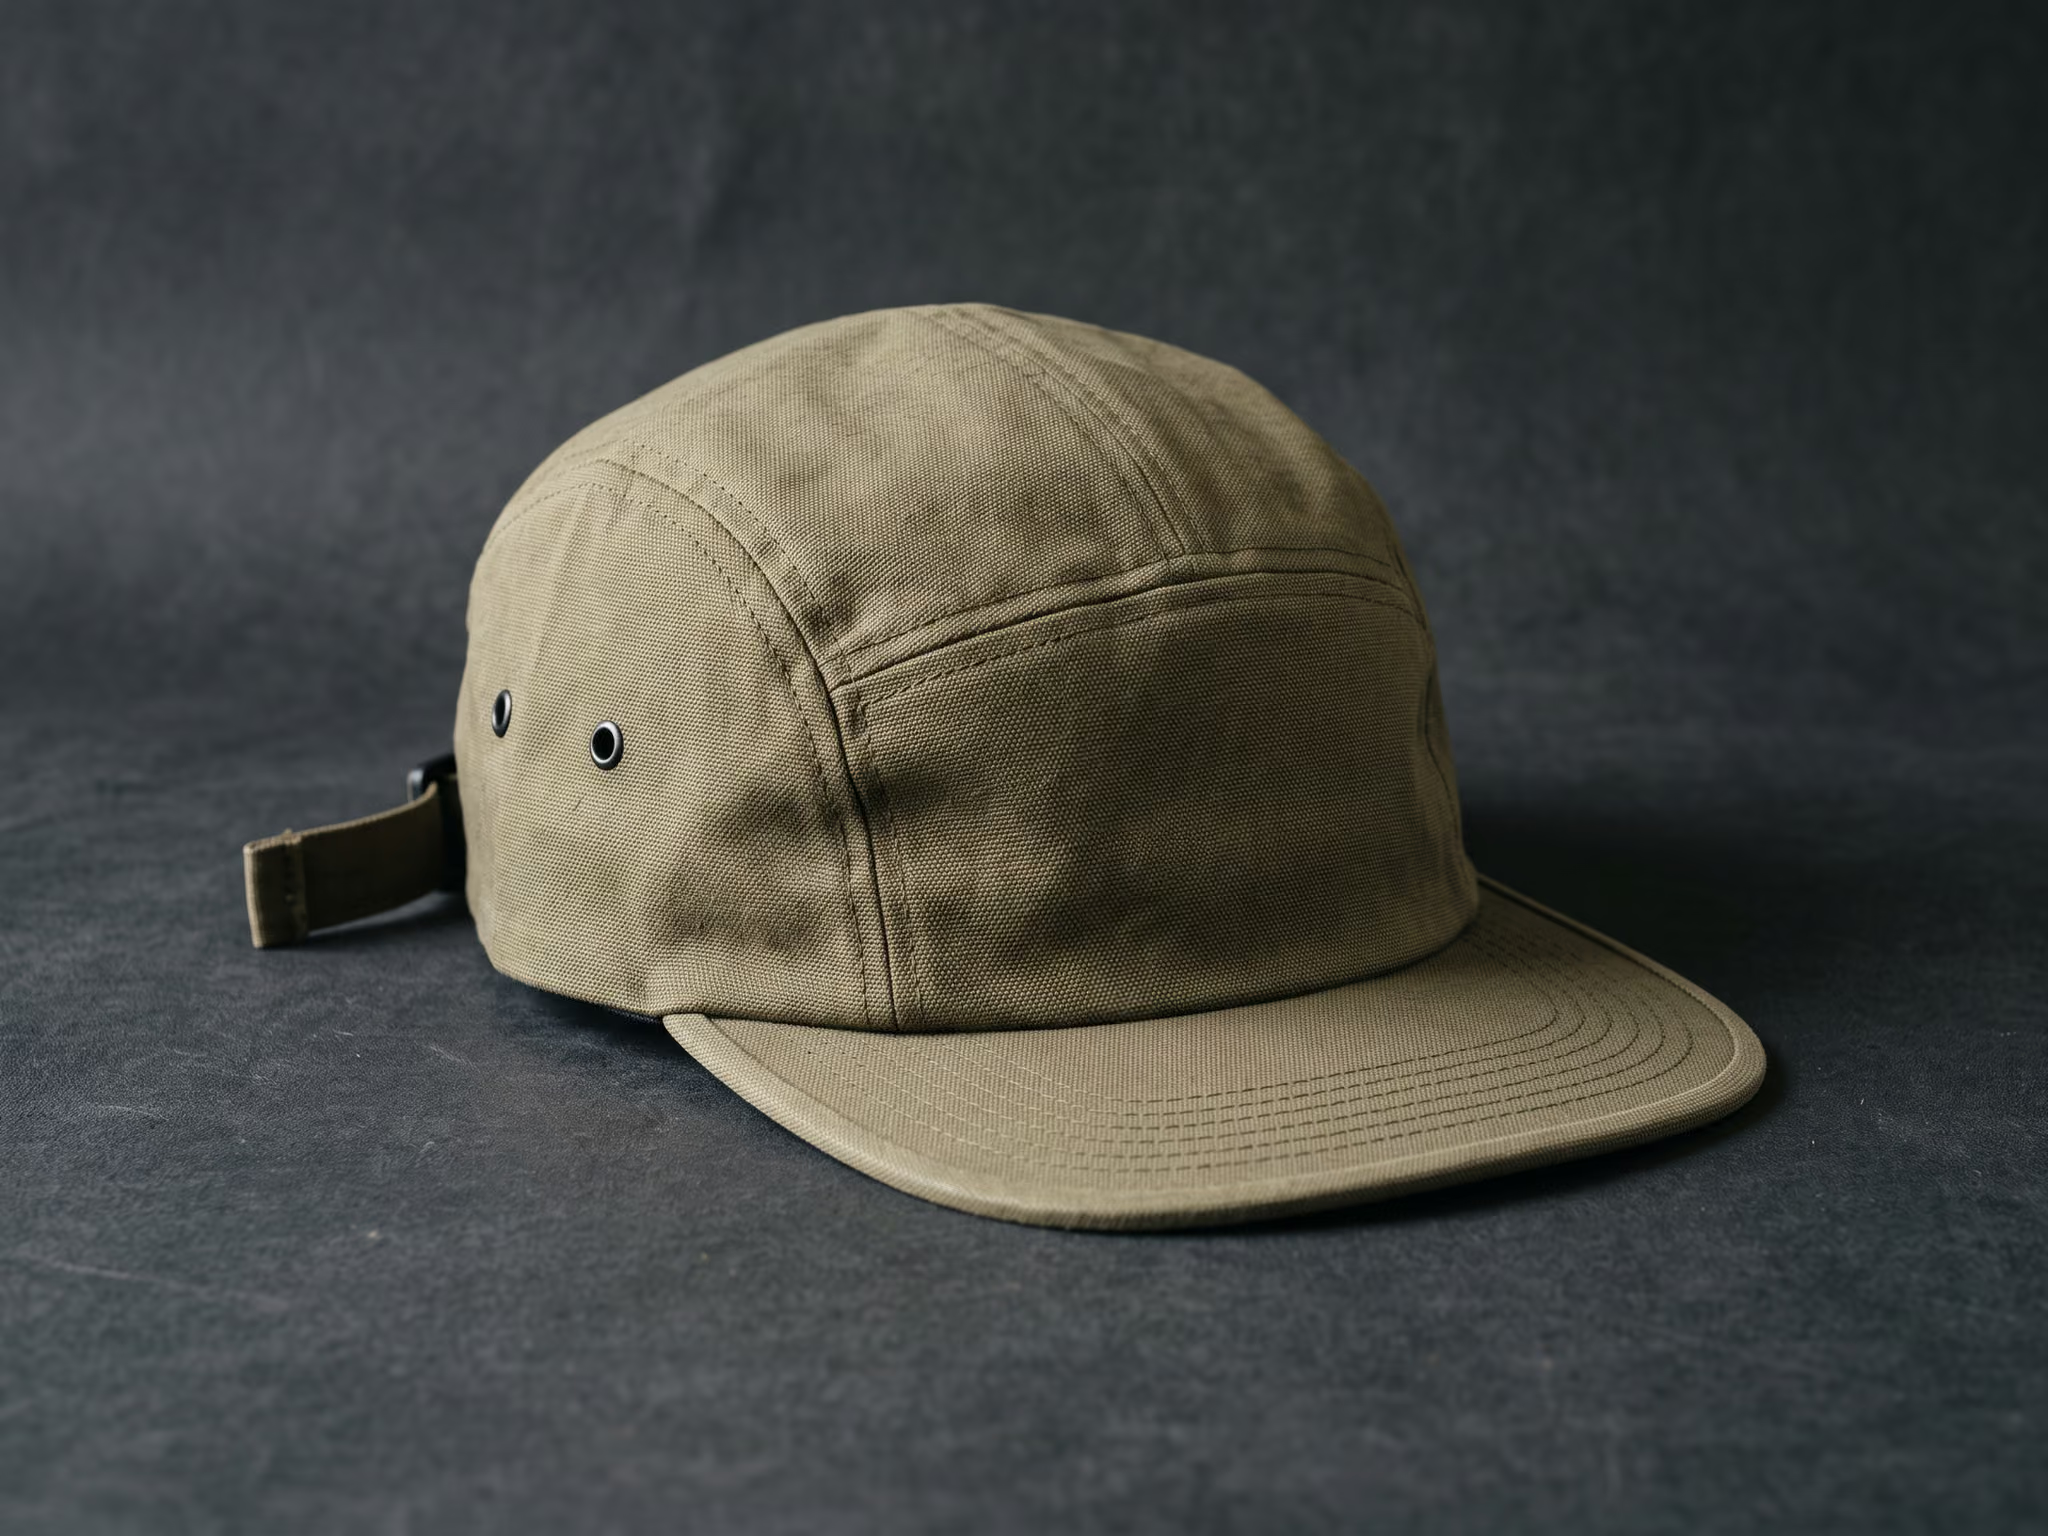
Five-panel camp
Flat brim, low crown, packs flat in a vest pocket.
Specs
- Profile
- Low profile
- Build
- 5-panel · Unstructured
- Crown
- 3¼ in (8.3 cm)
- Visor
- Flat, 2½ in (6.4 cm)
- Closure
- Strap back, side-release clip
- Adjusts to
- 21½–23½ in (54.5–59.5 cm)
- Airbrushed on
- Field olive nylon-cotton
- Sublimated on
- White polyester


Fit

| Cap | Profile | Crown height | Visor | Adjusts to |
|---|---|---|---|---|
| Trucker | Mid profile | 3½ in (8.9 cm) | Pre-curved, 2¾ in (7 cm) | 21½–24 in (54.5–61 cm) |
| Rope cap | Mid-high profile | 4 in (10.2 cm) | Near-flat, 2⅞ in (7.3 cm), contrast rope | 21½–23¾ in (54.5–60.5 cm) |
| Dad hat | Low profile | 3¼ in (8.3 cm) | Curved, 2¾ in (7 cm) | 21–23½ in (53.5–59.5 cm) |
| Five-panel camp | Low profile | 3¼ in (8.3 cm) | Flat, 2½ in (6.4 cm) | 21½–23½ in (54.5–59.5 cm) |
One size per cap. Run a tape around your head just above the ears, keeping it level — anything inside the range above will close on it.
Two finishes
The same design, made two ways. Pick one in the panel; the cap and the quantity are yours to choose too.
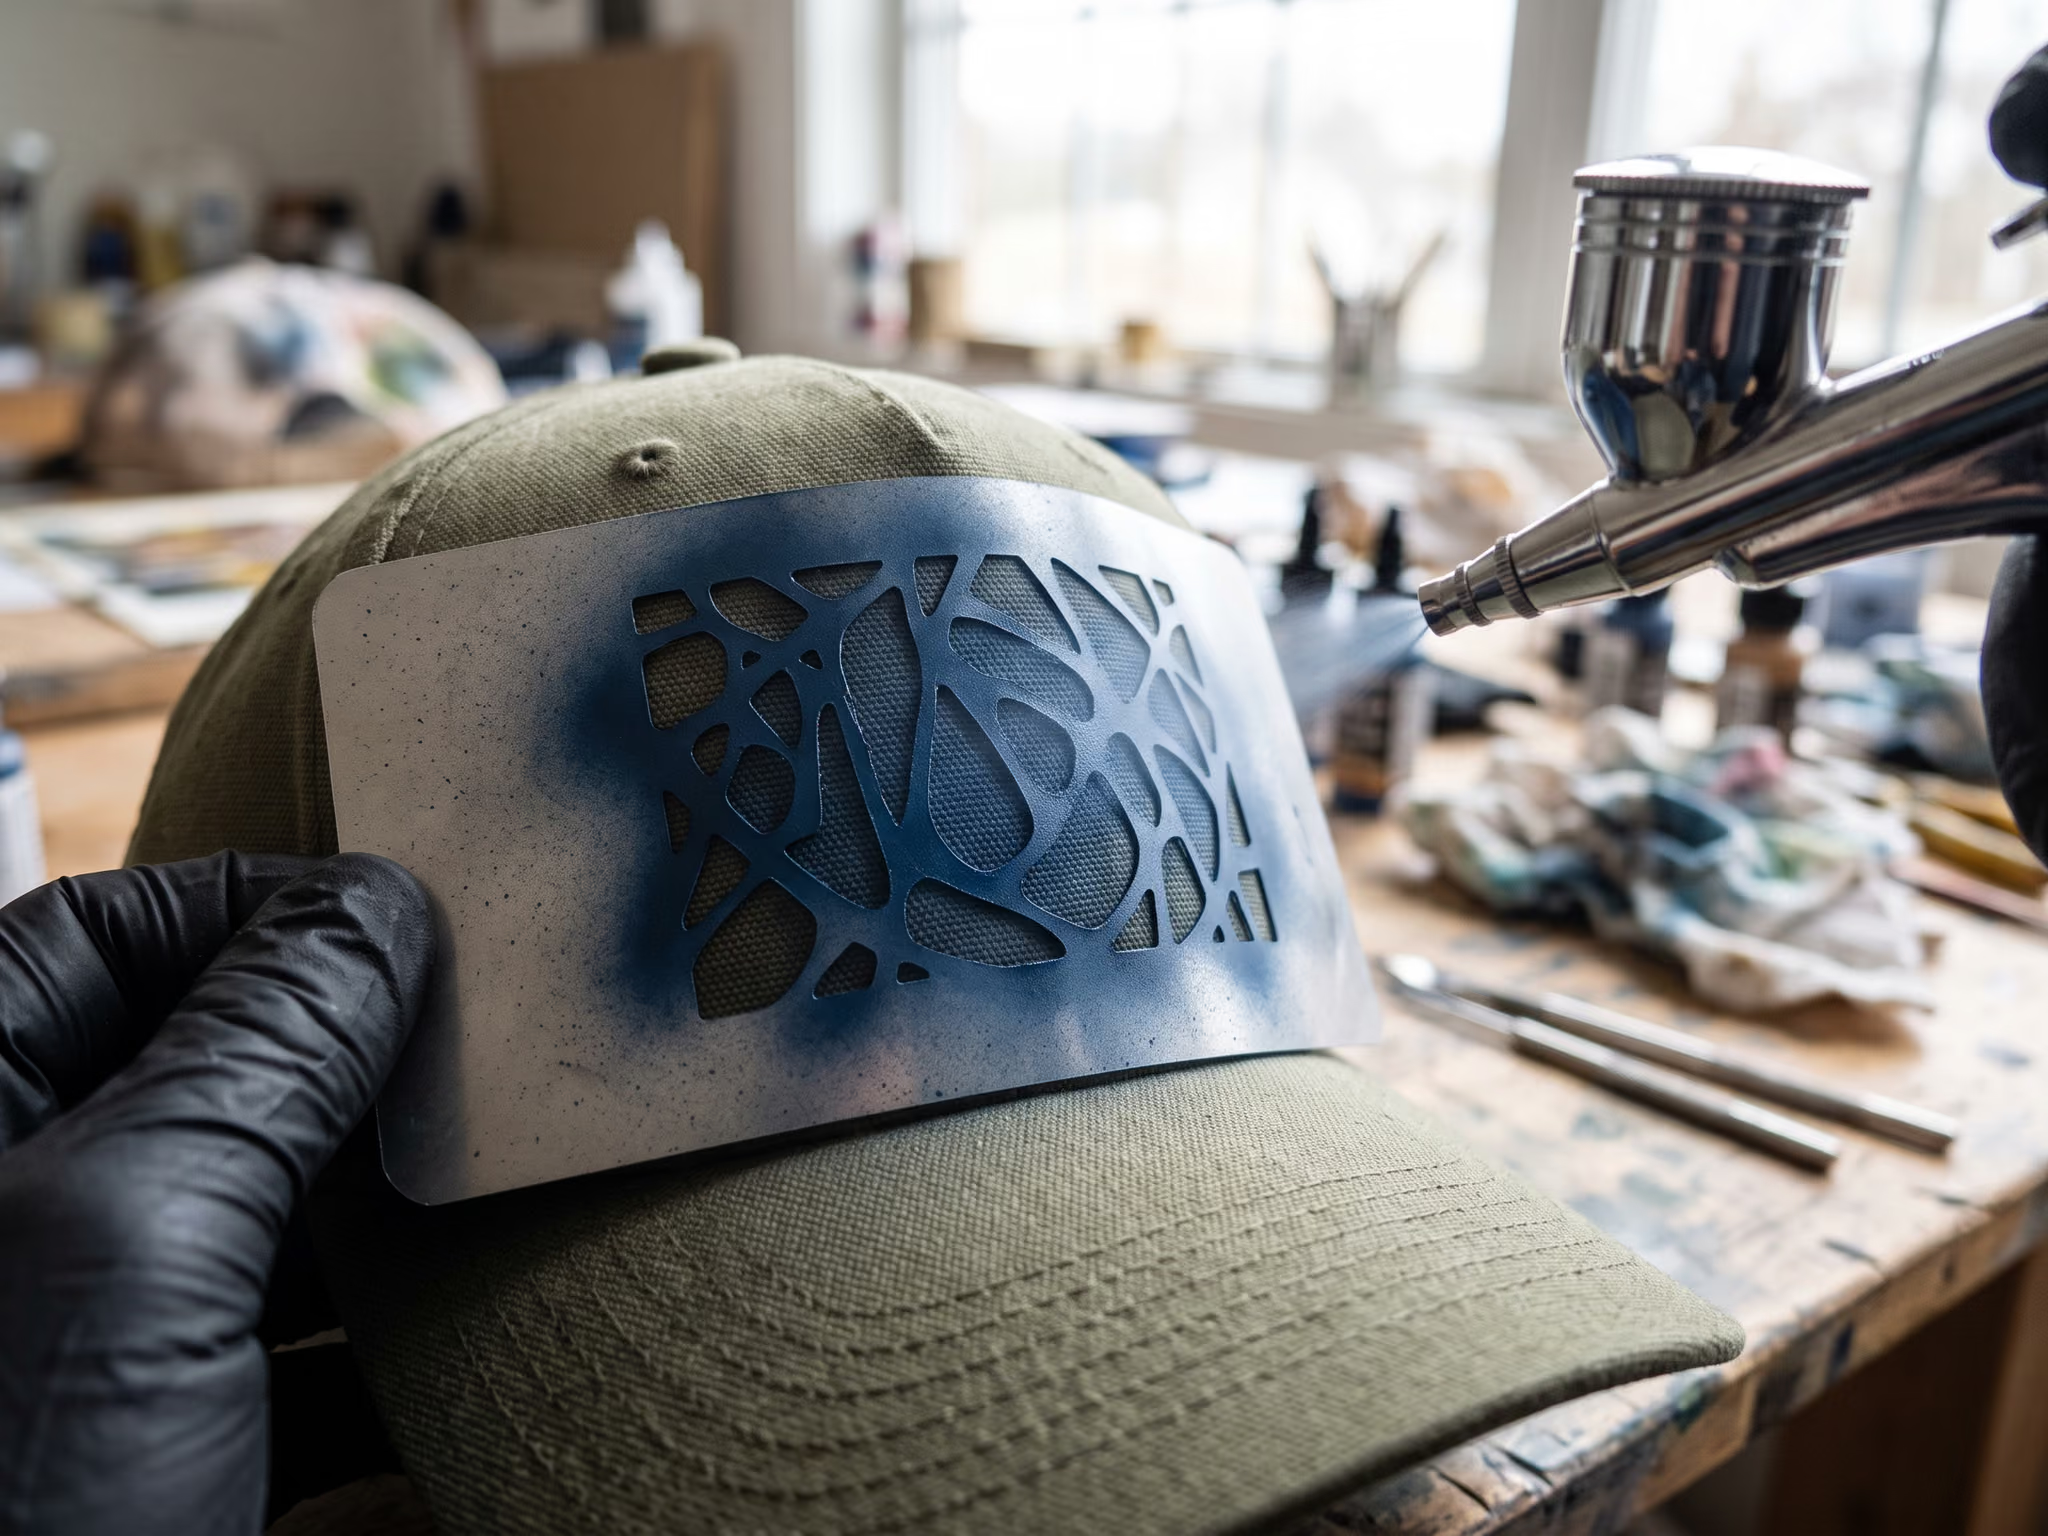
Hand airbrushed
$85 for one hat, on a trucker
Painted to order — would ship in about 2 weeks
How it is made
- How it is made
- Sprayed by hand through this design's own stencils, one layer at a time, each left to dry before the next mask goes down.
- How it looks
- Soft gradients and hand-cut stencil edges. Every cap is a little different.
- What it sits on
- On a natural cotton twill front.
- Durability and care
- Water-based paint, heat set and sealed. It takes rain and a season on a boat; spot clean with cool water, never a washing machine.
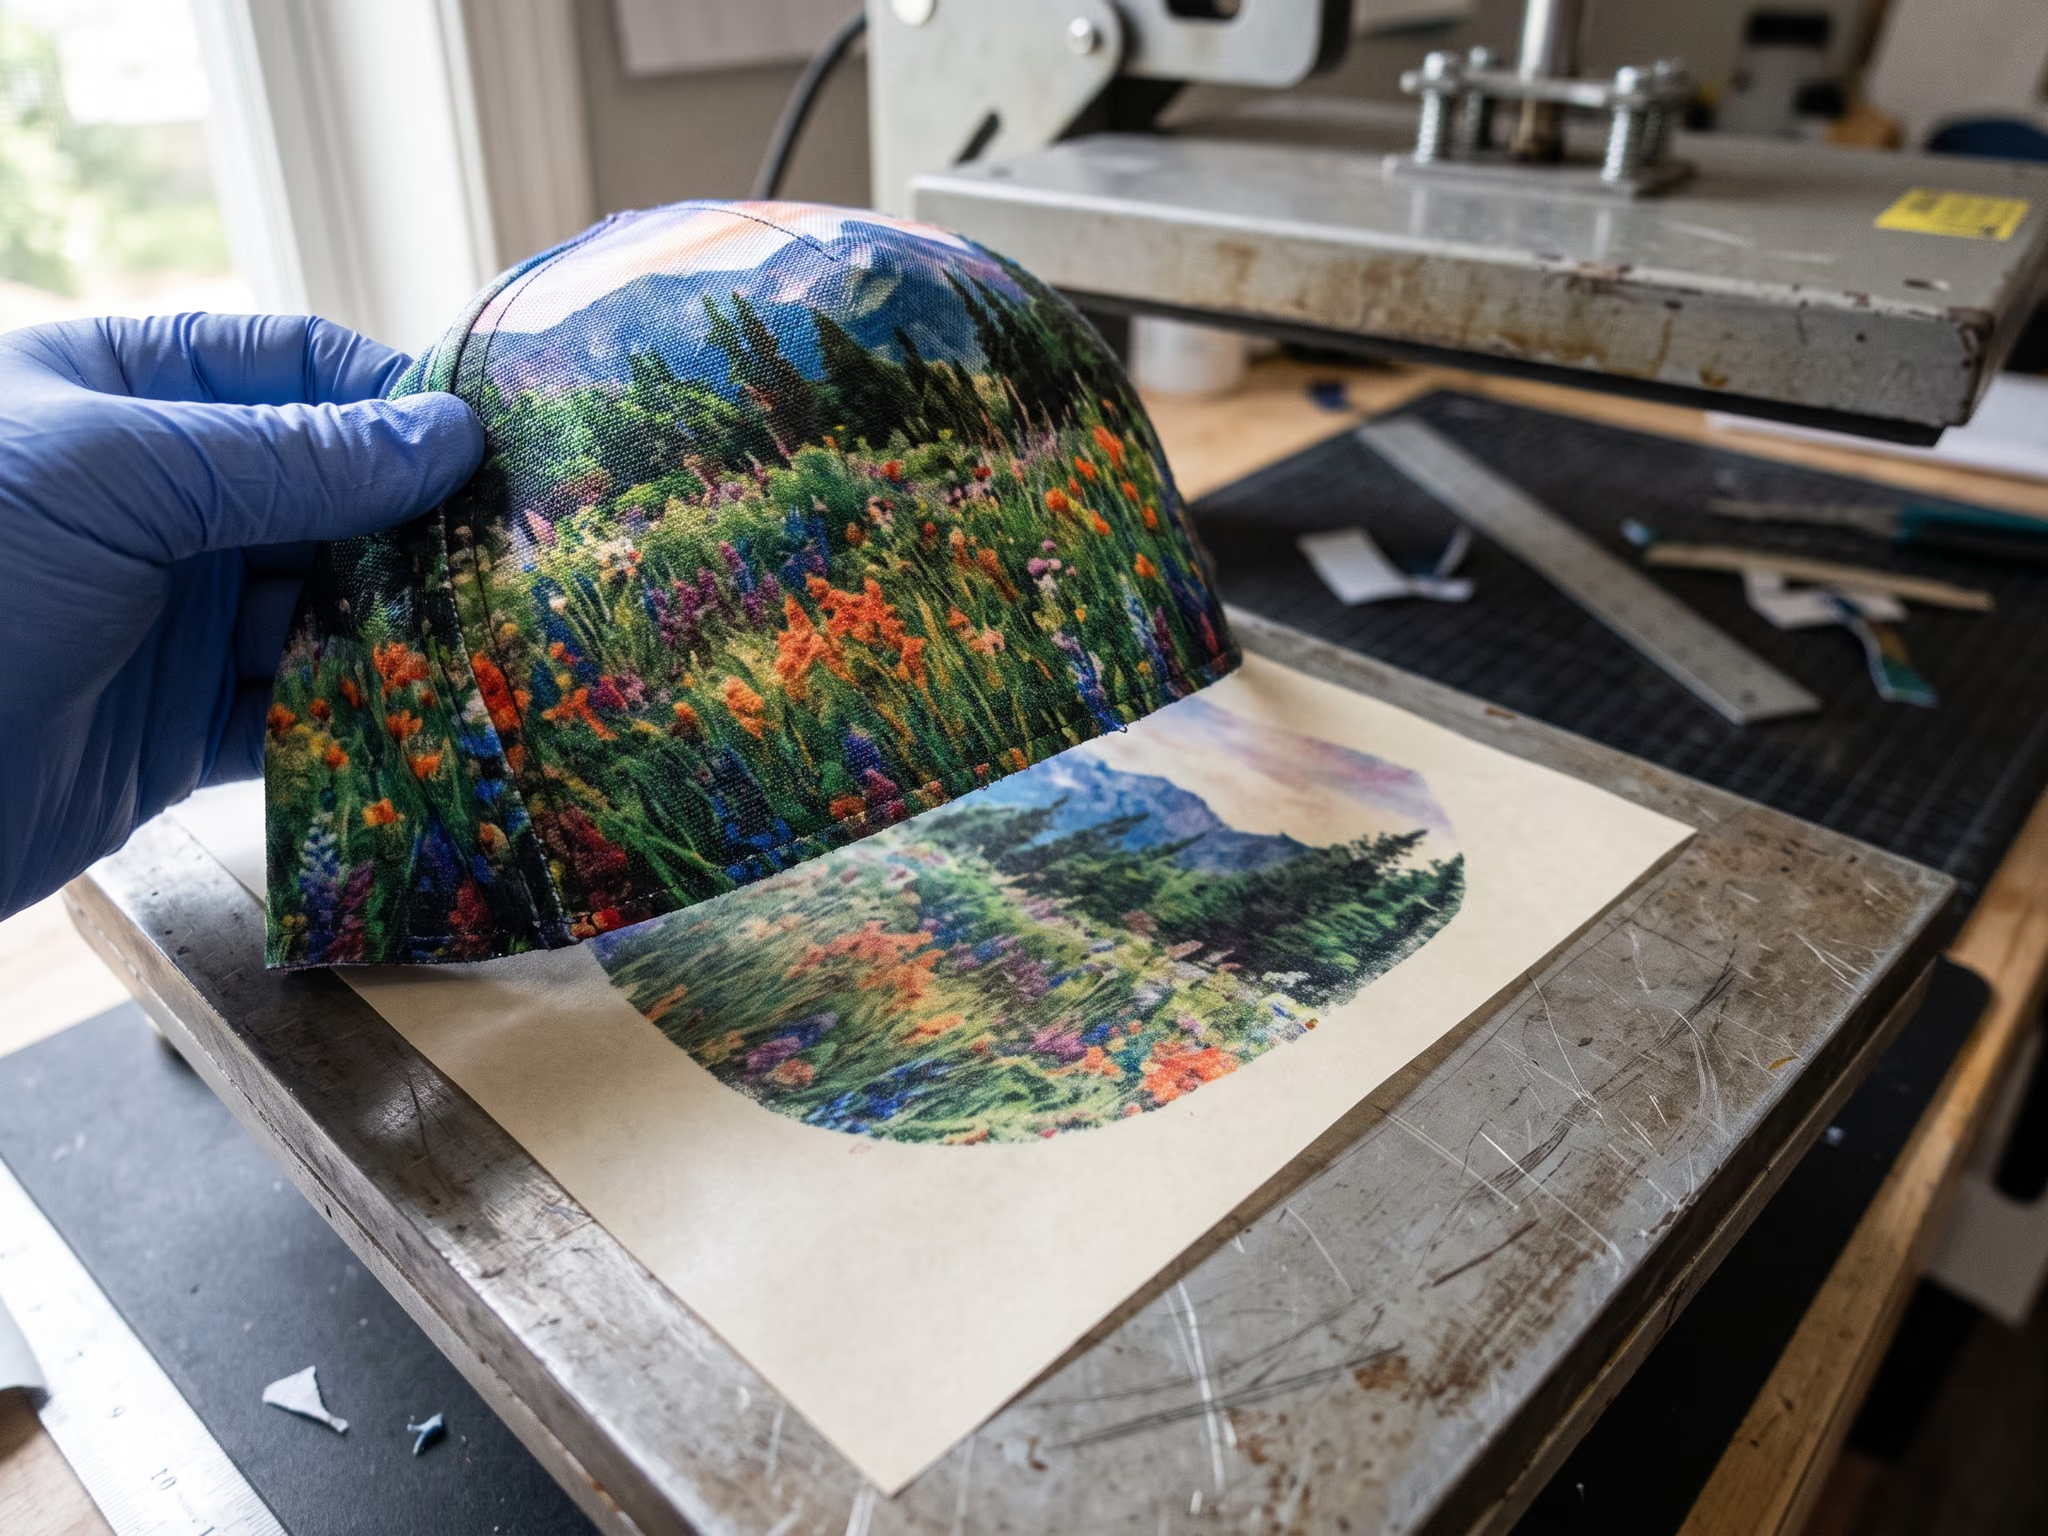
Sublimation printed
$32 for one hat, on a trucker
Printed to order — would ship in 5–7 business days
How it is made
- How it is made
- The design is printed in dye onto transfer paper, then pressed with heat so the dye soaks into the polyester fibres.
- How it looks
- Full colour edge to edge, and identical every time.
- What it sits on
- On a white polyester foam front — sublimation only takes on white polyester.
- Durability and care
- The dye is in the fibre, not on it, so it will not crack or peel. Gentle wash, air dry.


The artwork
A rainbow trout hangs mid-air, back curved, mouth open, tail still in the spray. Its olive back is peppered with black spots, and a rose red stripe runs the length of the flank. Below, the water breaks into ice blue and white, with droplets scattered around the fins.
It reads from across a parking lot at the put-in or across the bar after. People see the red stripe first, then the splash. It suits a long day of wading, a drive to the river, or just a Tuesday.
Soft edges on the rose red stripe make the fish look alive. Feather that layer into the olive green and cream rather than cutting it hard, so the colour blends the way it does on a real flank.

What arrives
- The hat
- A care card
- On a hand airbrushed hat, a numbered tag naming the water it was painted from, when the design names one

Looking after it
Hand airbrushed
- Spot clean with cool water and a soft brush. Never a washing machine.
- Keep it out of a hot car for long stretches — heat-set paint is tough, but a dashboard in July is not a test worth running.
- Reshape the brim by hand while damp.
Sublimation printed
- Spot clean, or gently hand wash in cool water. No bleach.
- Air dry. Do not iron the print.
- Reshape the brim by hand while damp.
- The dye is in the fibre, so the print will not crack or peel.
Details
Airbrush palette
- Colours
- ice blue, olive green, cream, rose red, orange, black, white
Details
- Subject
- rainbow trout
- Style
- realistic illustration
Make it yourself

The palette
- Ice blue
- Olive green
- Cream
- Rose red
- Orange
- Black
- White
The layers
7 layers, in this order. Each mask comes off and the paint has to dry before the next one goes down.
- Splash base
- Back
- Belly
- Stripe
- Fins
- Spots
- Highlights
The kit's stencil set is cut from these layers; with the cutter (12 hats and up) you cut your own from this design's layer files.
How to mix each colour
Ice blue
Primary blue, a drop of white to lighten it, a drop of black to deepen it; build it in thin coats
Olive green
2 parts yellow, 1 part black, a drop of red to warm it
Cream
White with a drop of yellow and the smallest touch of brown
Rose red
1 part red to 4 parts white, a drop of blue if it looks salmon
Orange
1 part red to 2 parts yellow
Black
Black from the bottle, sprayed in light passes; a heavy coat bleeds
White
Opaque white from the bottle; two thin coats cover better than one thick one
Setup
- Ventilation or a spray booth. Water-based paint still throws a fine mist, and you will be breathing it for hours.
- A half-mask respirator rated for paint mists. A dust mask is not one.
- A compressor with a moisture trap, set and tested on a card before you start: wet air spits water into the paint.
- Reducer and a cleaning pot within reach, so a clog is a ten-second fix instead of a ruined panel.
- Spray a test card for every colour before it touches the cap. Colour reads differently wet, dry and on twill.
Prep
- Lint-roll the front panel. Every fibre left on it prints as a speck in the paint.
- Mask the mesh, any seams you want clean and the whole visor, underside included, with low-tack tape and paper.
- Stretch the crown over the cap jig so the front panel is taut and curved the way it will be worn. Spraying a slack panel flat distorts the design when it is worn.
- Spray one light coat of transparent base so the colour sits on the fabric instead of soaking into it.
Layer by layer
1 · Splash base — 0.5 mm · 25–30 PSI
ice blue — the churned fan of water and spray beneath the fish
Mask None on the panel itself: the mesh and the visor are already masked from the prep.
Colour Ice blue — Primary blue, a drop of white to lighten it, a drop of black to deepen it; build it in thin coats
- Needle
- 0.5 mm (a 0.35 mm works, it just takes longer)
- Pressure
- 25–30 PSI
- Distance
- 6–8 in from the panel
- Passes
- 3–4 light passes, building the colour
- Dry
- 10 minutes, or 60–90 seconds with a heat gun on low, before the next mask goes down
Tip Fade wet to dry and never lay one heavy coat: twill wicks paint sideways and the edge blooms.
2 · Back — 0.35 mm · 20–25 PSI
olive green — the trout's back and upper flank, from nose to tail
Mask Lay this layer's mylar stencil and burnish the edges flat with your thumbnail.
Colour Olive green — 2 parts yellow, 1 part black, a drop of red to warm it
- Needle
- 0.35 mm
- Pressure
- 20–25 PSI
- Distance
- 4–6 in from the panel
- Passes
- 2–3 passes
- Dry
- 10 minutes before lifting the stencil
Tip Spray away from the stencil edge, not into it, so the air does not push paint underneath.
3 · Belly — 0.35 mm · 20–25 PSI
cream — the pale lower flank and belly
Mask Lay this layer's mylar stencil and burnish the edges flat with your thumbnail.
Colour Cream — White with a drop of yellow and the smallest touch of brown
- Needle
- 0.35 mm
- Pressure
- 20–25 PSI
- Distance
- 4–6 in from the panel
- Passes
- 2–3 passes
- Dry
- 10 minutes before lifting the stencil
Tip Spray away from the stencil edge, not into it, so the air does not push paint underneath.
4 · Stripe — 0.35 mm · 20–25 PSI
rose red — the band along the flank and the blush on the gill plate
Mask Lay this layer's mylar stencil and burnish the edges flat with your thumbnail.
Colour Rose red — 1 part red to 4 parts white, a drop of blue if it looks salmon
- Needle
- 0.35 mm
- Pressure
- 20–25 PSI
- Distance
- 4–6 in from the panel
- Passes
- 2–3 passes
- Dry
- 10 minutes before lifting the stencil
Tip Spray away from the stencil edge, not into it, so the air does not push paint underneath.
5 · Fins — 0.35 mm · 20–25 PSI
orange — the pectoral, pelvic and anal fins and the edge of the tail
Mask Lay this layer's mylar stencil and burnish the edges flat with your thumbnail.
Colour Orange — 1 part red to 2 parts yellow
- Needle
- 0.35 mm
- Pressure
- 20–25 PSI
- Distance
- 4–6 in from the panel
- Passes
- 2–3 passes
- Dry
- 10 minutes before lifting the stencil
Tip Spray away from the stencil edge, not into it, so the air does not push paint underneath.
6 · Spots — 0.3 mm · 18–22 PSI
black — speckles across the back, fins and tail, plus the eye
Mask The hand-cut subject stencil, inner pieces first, then the outline piece.
Colour Black — Black from the bottle, sprayed in light passes; a heavy coat bleeds
- Needle
- 0.3 mm
- Pressure
- 18–22 PSI
- Distance
- 3–4 in from the panel
- Passes
- 2–3 passes per tone, light to dark
- Dry
- 10 minutes between tones
Tip Light tones first: a light colour over a dark one needs many coats, a dark one over a light one needs two.
7 · Highlights — 0.2–0.3 mm · 12–15 PSI
white — spray crests, flying droplets, the eye glint and a sheen along the scales
Mask None: freehand, with a shield card held against any hard edge.
Colour White — Opaque white from the bottle; two thin coats cover better than one thick one
- Needle
- 0.2–0.3 mm
- Pressure
- 12–15 PSI
- Distance
- 1–2 in from the panel
- Passes
- Freehand, in short controlled strokes
- Dry
- 10 minutes, then check it before you cure
Tip Low pressure, close in and moving: stop the stroke before you release the trigger.
Step by step
Settings in these steps are a starting point; test on scrap first and adjust to your paint and airbrush.
Mask everything but the splash area. Spray ice blue at about 20 PSI, 0.3 mm needle, 10–15 cm away, building a fan shape that is denser at the bottom.
Lay the fish mask. Spray olive green over the back and upper flank at about 18 PSI, 0.3 mm needle, 8–10 cm away, darkest along the spine.
Shift to the belly mask. Spray cream along the lower flank and belly at about 18 PSI, 0.3 mm needle, 8–10 cm away, letting it meet the olive softly.
Using a loose stripe mask, spray rose red along the flank and onto the gill plate at about 15 PSI, 0.2 mm needle, 5–8 cm away. Keep the edges feathered.
Mask the fins and tail edge. Spray orange at about 15 PSI, 0.2 mm needle, 5–8 cm away, heaviest at the fin bases.
With a spot stencil or freehand, add black speckles over the back, fins and tail, plus the eye, at about 12 PSI, 0.2 mm needle, 2–4 cm away.
Finish with white: spray crests and droplets around the splash, a glint in the eye and a thin sheen along the scales, at about 12–15 PSI, 0.2 mm needle, 3–6 cm away.
Let each layer dry to the touch before the next mask goes down.
Cure fully following the paint maker's directions, then seal per the same directions before wearing.
Cure
- Heat set at 300°F / 150°C. Water-based textile paint is not wash-fast until it is heat set.
- Cap press: 3–5 minutes with a teflon sheet over the design.
- Or heat gun: 2–3 minutes per panel, keeping it moving 2–3 in off the fabric so it does not scorch.
- If you have neither, air cure for 72 hours before the cap touches water.
Seal
- Two light coats of matte fabric sealer, UV-resistant, from 8–10 in, 15 minutes apart.
- Leave it 24 hours before the cap is worn.
- Never a gloss sealer on cotton twill: it shines, cracks along the creases and looks like a sticker.
Clean-up
- Flush the brush with water, then airbrush cleaner, until it sprays clear.
- Strip the needle and wipe it toward the tip, never away from it.
- Never soak the brush body overnight.
Common mistakes
- Hard-edged rose red stripe that looks pasted on. Lift the mask slightly and spray from further back to soften it.
- Spots too even and grid-like. Scatter them by eye and break up any rows.
- Too much white in the splash, burying the fish. Add white in passes and stop once the tail still reads.
- Laying a mask on wet paint and pulling the layer below. Wait until each coat is dry to the touch.
Tips
- Spray the splash in short bursts from the bottom up so it looks like it is still rising.
- Vary the size of the black spots: smaller near the head, larger toward the tail.
- Leave a few gaps in the ice blue so the white droplets later have dark ground to pop against.
- A tiny dot of white in the eye last brings the whole fish to life.
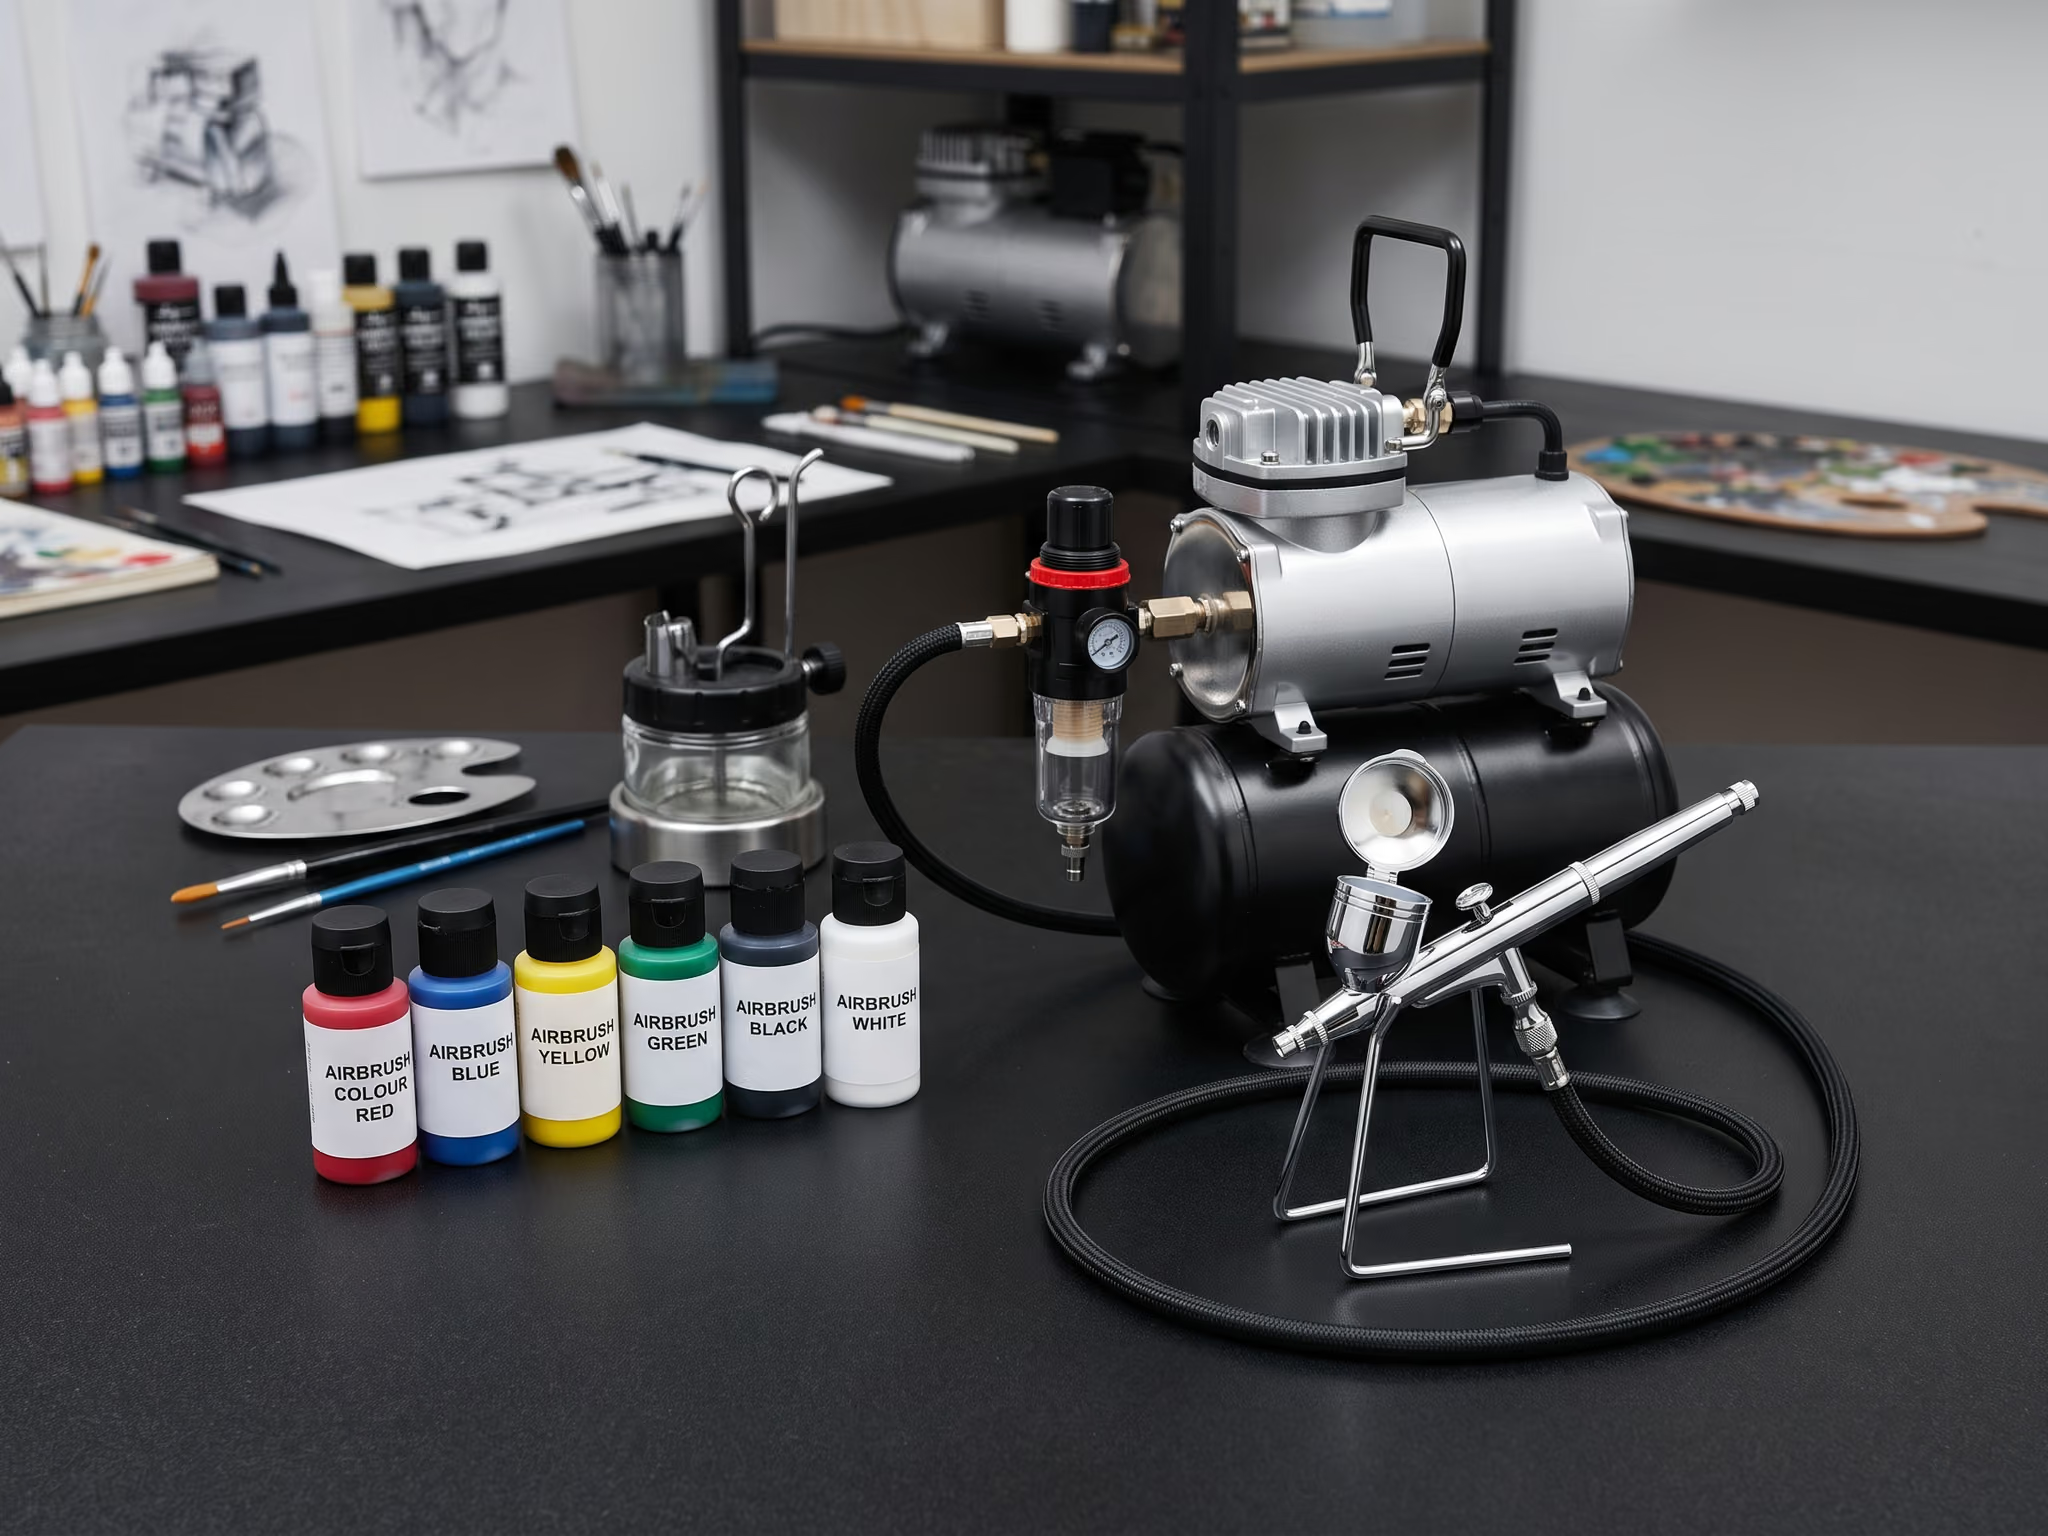
Every kit size
Trucker · kit for 1 hat
$224
Bought separately $249 · you save $25
Includes Starter airbrush set · Cap jig · and 7 more
Every item in this kit · 9 items
Blanks
- Trucker blank, natural cotton twill front$9
Stencils
- Pre-cut mylar stencil set for this design — 7 layers$18
Paint & masks
- Water-based textile airbrush colour, 2 oz — one per colour in this design$42
- Transparent base and reducer, 4 oz$7
- Low-tack masking film and ¼ in tape$8
- Matte fabric sealer, 4 oz$12
Equipment
- Starter airbrush set — 0.3 mm dual-action gravity brush, mini compressor, braided hose$129
- Cap jig — holds the crown taut while you spray$24
Guide
- Printed step-by-step guide for this designIncluded
Trucker · kit for 12 hats
$1,073
$89.42 a hat
Bought separately $1,220 · you save $147
Includes Dual-action gravity-feed airbrush · Quiet compressor with tank and moisture trap · Cap jig and two spare crown forms · Tabletop spray booth with exhaust fan · and 11 more
Every item in this kit · 15 items
Blanks
- Trucker blank, natural cotton twill front$78
Stencils
- Desktop stencil cutter, 12 in — the "stencil printer": cuts mylar from this design's layer files$299
- Stencil mylar, 7 mil, 12 × 12 in$22
- This design's layer files, every layer (SVG)Included
Paint & masks
- Water-based textile airbrush colour, 4 oz — one per colour in this design$98
- Transparent base and reducer, 16 oz$16
- Low-tack masking film$18
- Matte fabric sealer, 16 oz$28
Equipment
- Dual-action gravity-feed airbrush, 0.3 mm$135
- Quiet compressor with tank and moisture trap$179
- Cap jig and two spare crown forms$64
- Tabletop spray booth with exhaust fan$149
- Cleaning pot, brushes and a half-mask respirator$99
- Heat gun for curing$35
Guide
- Printed step-by-step guide for this designIncluded
Trucker · kit for 12 × 12 hats
$3,124
$21.69 a hat
Bought separately $3,676 · you save $552
Includes Two dual-action gravity-feed airbrushes · Production airbrush · Twin-piston compressor with tank and two regulators · Production spray booth · and 13 more
Every item in this kit · 17 items
Blanks
- Trucker blank, natural cotton twill front$756
Stencils
- Stencil cutter-plotter, 24 in — the production "stencil printer"$649
- Stencil mylar, 7 mil, 12 × 12 in$85
- This design's layer files, every layer (SVG)Included
Paint & masks
- Water-based textile airbrush colour, 32 oz — one per colour in this design$336
- Transparent base and reducer$49
- Low-tack masking film$54
- Matte fabric sealer$89
Equipment
- Two dual-action gravity-feed airbrushes, 0.3 mm$270
- Production airbrush, 0.5 mm, for base fades$95
- Twin-piston compressor with tank and two regulators$329
- Production spray booth, two fans$289
- Three cap jigs$192
- Cleaning station, respirator and spare cartridges$139
- Cap heat press for curing$279
- Drying rack, 24 caps$65
Guide
- Printed step-by-step guide for this designIncluded
The creator


Remixes
No remixes yet — make your own version.
Where this came from
trucker hat · made
0 — nothing entered the score yet, at the Derby's published weights, since . Views are not counted.
- rainbow trout
- trout
- fly fishing
- jumping fish
- splash
- trucker hat
- rose red
- olive green
- fishing hat
- trout art